
BeadMod documentation
BeadMod is a visual workspace for designing beaded jewellery, loom patterns, and structured beaded handbags. The current product is organised into three studios that share cloud saving, media exports, responsive controls, and an interactive first-design guide.
Choose a studio
| Studio | Open in the app | What you make | Start here |
|---|---|---|---|
| Bracelet Designer | Dashboard → Bracelet Designer | 3D strands for bracelets, necklaces, rings, earrings, and anklets | Getting started |
| Loom Designer | Dashboard → Loom Designer | Flat bead grids with a live 3D preview | Loom and AI tools |
| Handbag Designer | Dashboard → Handbag Designer | Multi-panel beaded bags in 2D and 3D | Handbag Designer |
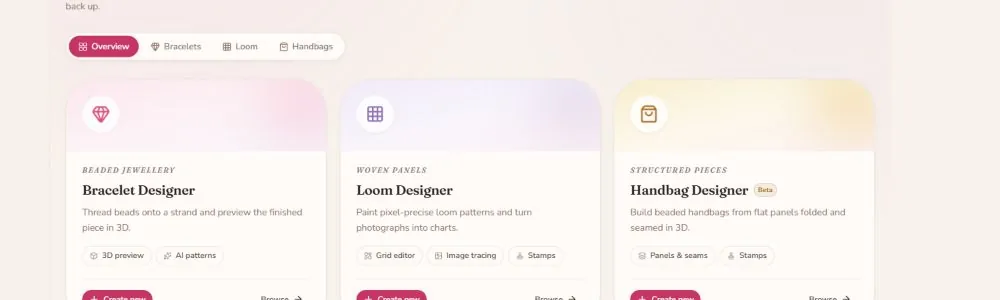
Live UI snapshot captured from the local app on August 26, 2026. The example cards are shown without a saved design.
Recommended reading paths
I am new to BeadMod
- Getting started — understand the dashboard and first-design guide.
- Studios and product types — choose between a strand, loom, or handbag workflow.
- Properties and materials — customise beads, thread, layout, and scene settings.
- Studio, capture, and gallery — create stills, turntables, and reusable references.
I want to make a loom pattern
- Loom AI features — import images, generate patterns, extract colours, and use the library.
- Loom AI quick reference — keep the main controls nearby while you work.
- Bead types — choose shapes and accents for a strand or panel.
I want to make a handbag
- Handbag Designer — learn panels, stitch layouts, stamps, styles, and the 3D preview.
- Studio features — prepare a clean preview and AI visualization.
- FAQ — check save, quota, media, and troubleshooting answers.
What changed in the current version
- The dashboard is now My Studio, with separate Bracelet, Loom, and Handbag tabs.
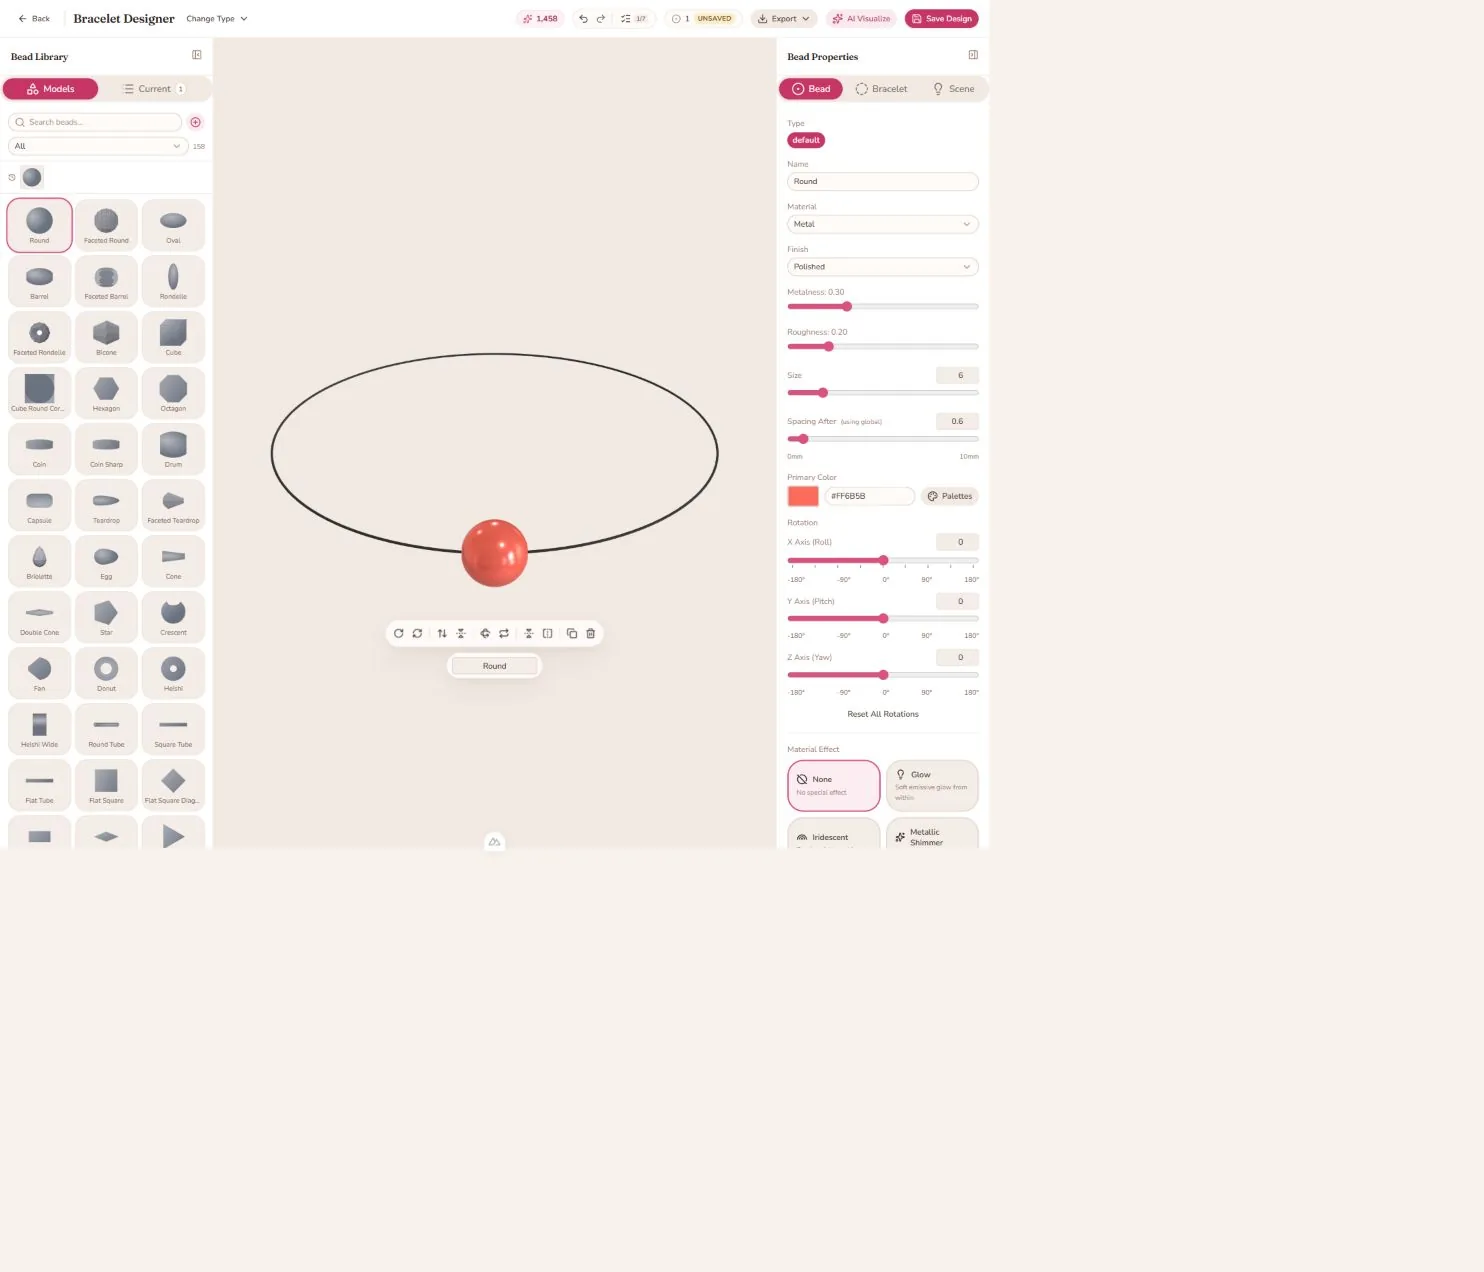
- The Bracelet Designer still supports five strand product types: bracelet, necklace, ring, earrings, and anklet.
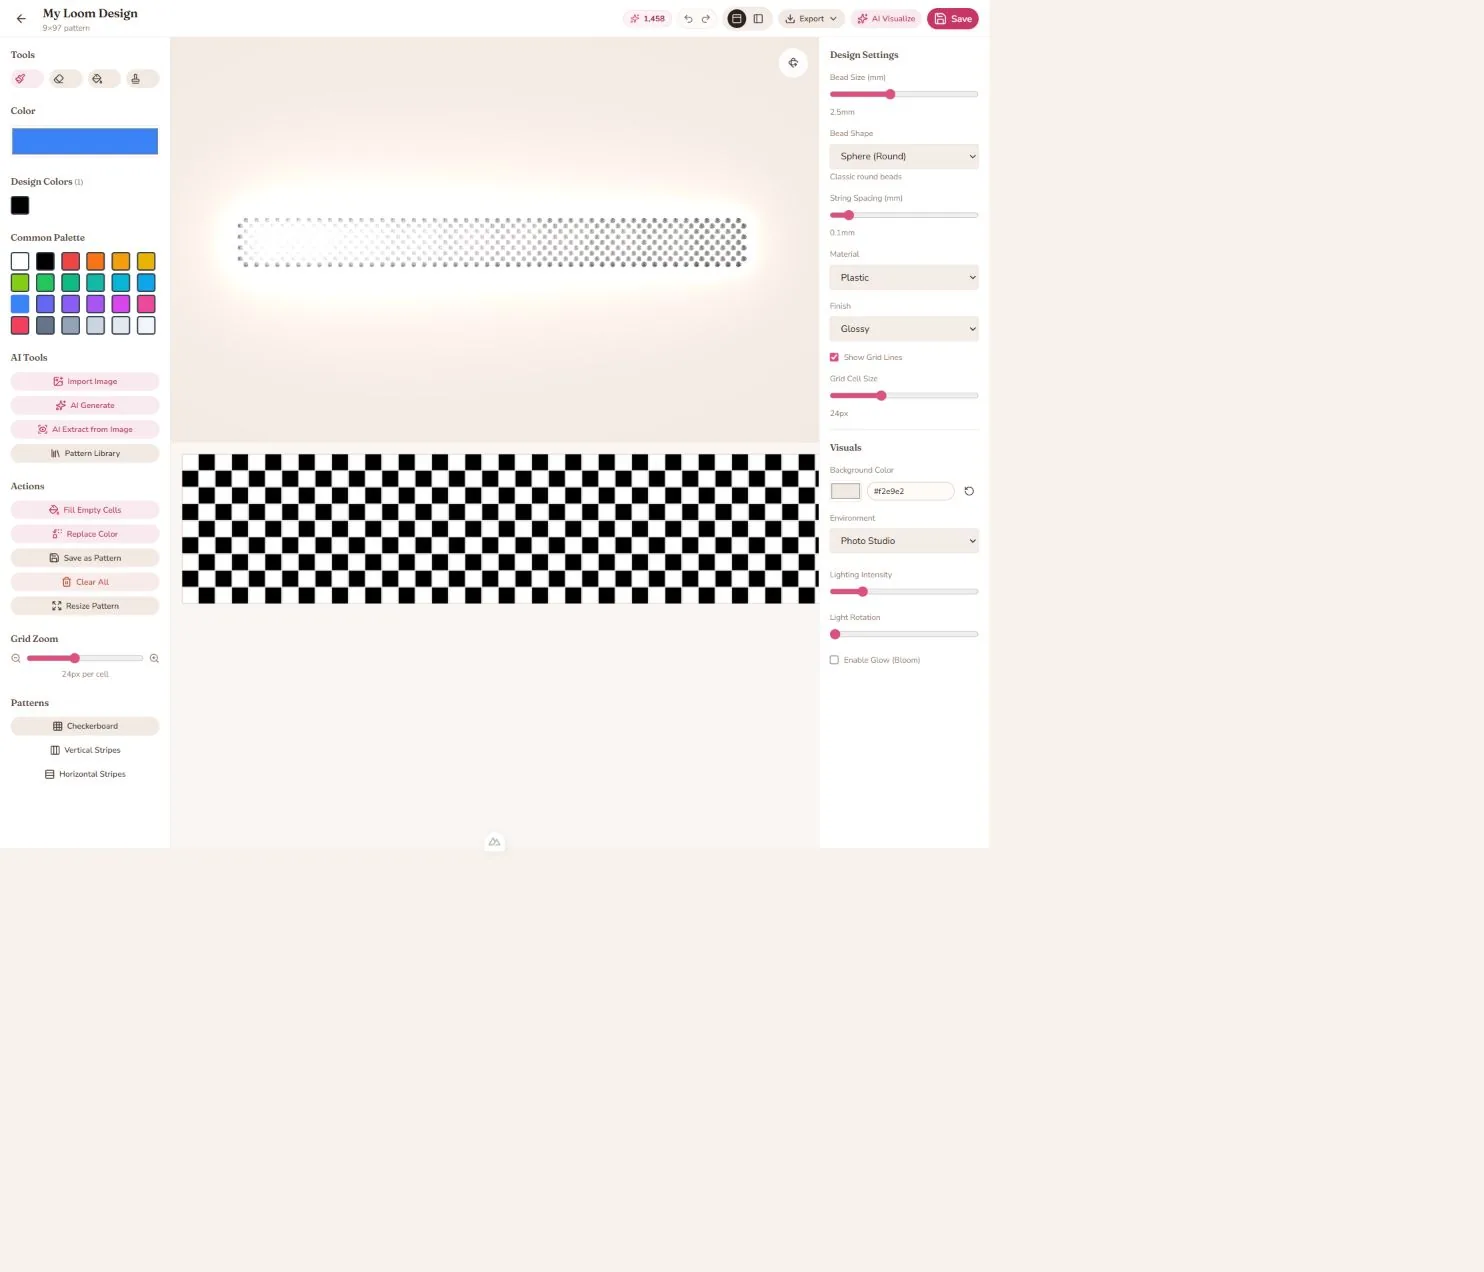
- The Loom Designer combines a paintable grid with a 3D preview and supports image import, AI generation, AI extraction, reusable stamps, pattern presets, resize, fill, colour replacement, and pattern export.
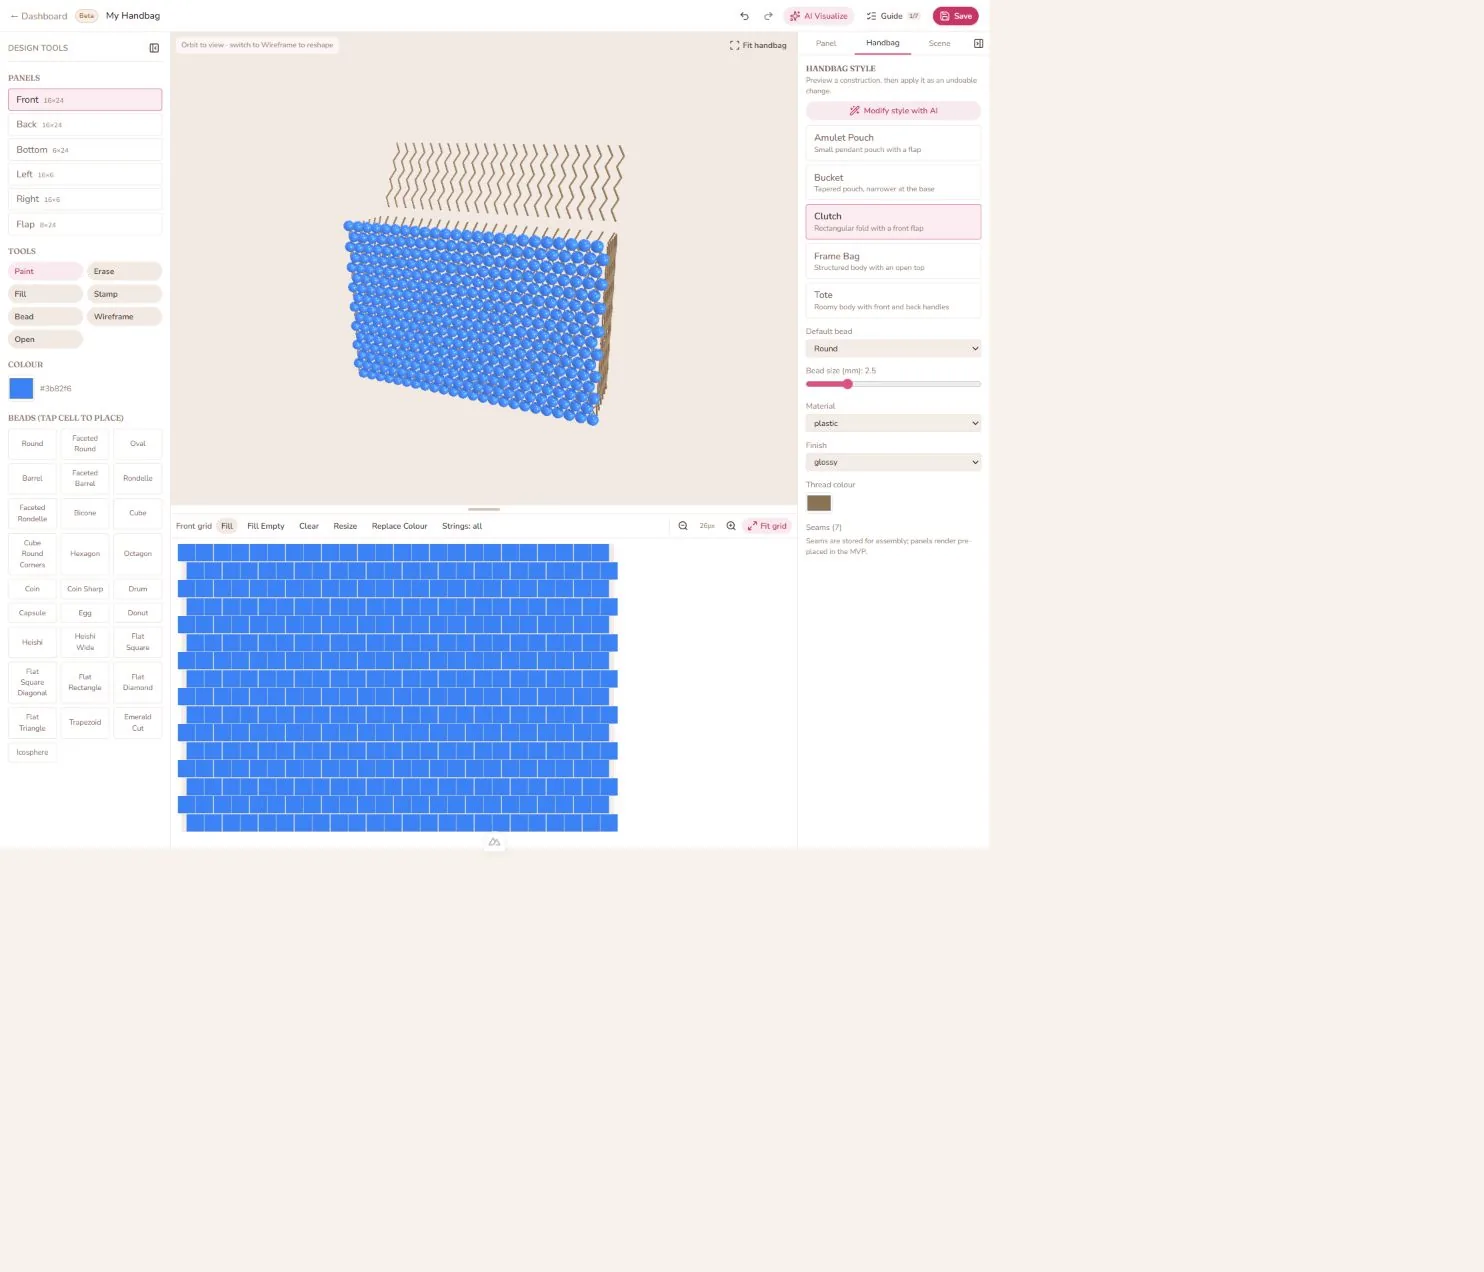
- The Handbag Designer is a Beta panel-based editor with curated styles, four stitch layouts, per-panel grids, reusable stamps, 3D orbit/fit controls, wireframe reshaping, draft recovery, and AI-assisted style changes.
- Saved designs, generated images, captures, and videos are managed from the dashboard and Gallery.
- The first-design guide is task-based: it completes when you perform the action in the editor, and it can be dismissed, resumed, or practised again.
Shared controls
- Undo / Redo: available in each editor. Keyboard shortcuts are
Ctrl+ZandCtrl+Shift+Zon Windows; useCmdinstead ofCtrlon macOS. - Save: saves the current design to your account. New designs use a name prompt; existing designs are updated.
- Export: opens capture, download, pattern-info, or video options appropriate to the editor.
- AI Visualize: saves the current design when required, then opens scene presets and custom-prompt controls. Generation spends AI tokens.
- Guide: opens the task-based first-design checklist.
- Gallery: stores captures and AI-generated images, plus videos and reference images when available on your plan.
Limits and plans
Project allowances and AI tokens are plan-dependent. The sidebar shows the current token balance and separate Bracelet, Loom, and Handbag project meters. Open Subscription or Pricing & plans from the account menu for the live limits and storage allowance on your account.
Documentation snapshots
These images are real UI captures from the running local app. The bracelet and Loom examples are temporary in-memory examples; they were not saved to the account.
All guides
- Getting started
- Studios and product types
- Handbag Designer
- Material effects
- Global defaults and sizing
- Properties guide
- Bead types
- Loom AI features
- Loom AI quick reference
- Studio features
- Performance guide
- FAQ
If a control has moved since an older guide was written, use the current UI label as the source of truth. The in-app Help menu opens this documentation from any signed-in workspace.
Last reviewed: August 26, 2026